Canning and food preservation have deep roots in the South, shaping how families put food on their tables across generations. Recipes and traditions are passed down, and the practice itself is as much about family history as making sure fresh produce is available year-round. When I first started my own adventure with canning, I felt a real sense of connection with these traditions. If you’re new to Southern canning and preservation, I’ll walk you through the basics so you can jump in with confidence and keep your food fresh the old school way. Let’s take a closer look at how you can get started in your own kitchen, whether you’re looking to put up a bounty from your garden or experiment with classic Southern recipes.
What Makes Southern Canning & Preservation Unique?
Many regions in the United States have their own styles of preserving fruits and vegetables, but the South brings its own character to the process. The warm climate leads to long growing seasons, which means there is a wide range of crops to preserve, from peaches and okra to tomatoes and beans. Family gardens fill up quickly in summer, and canning is a practical way to make sure nothing goes to waste.
The homemade touch still matters a lot. I grew up seeing family friends gift homemade jams, pickles, or chowchow at holidays. These foods are more than just tasty; they’re a way to share a bit of home with others. Some Southern specialties, like watermelon rind pickles or tomato preserves, are hard to find outside the region, adding to their charm.
Understanding The Basics of Canning and Preservation
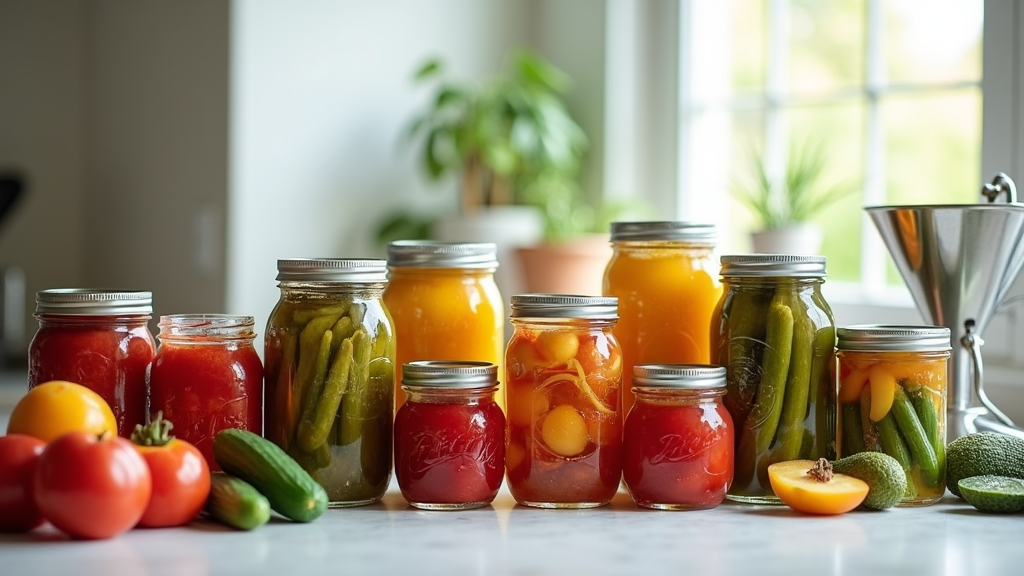
Preserving food means using different methods to slow down spoilage and keep food safe to eat for long periods. The two canning methods most often used in Southern kitchens are water bath canning and pressure canning. These two methods cover nearly all the pickles, jams, jellies, and vegetable preserves you’re likely to try.
- Water Bath Canning: Used for foods high in acid, like peaches, strawberries, pickles, and tomato sauces. The jars are processed in boiling water for a set time to kill bacteria and seal the lids.
- Pressure Canning: Needed for low-acid foods such as green beans, okra, and meats. A special pressure canner heats jars to a higher temperature than regular boiling, making these foods safe for storage.
Figuring out the best method for each food is really important. Using the wrong process can lead to spoiled food or, in some cases, make you sick.
Preservation also covers other techniques, too, like freezing or drying, that help you stretch the harvest and make different textures and flavors to enjoy later. In the South, it’s not uncommon to see rows of colorful dried peppers, bags of frozen peas, or sweet jams lined up alongside canned goods as part of the family stash.
Step by Step: How To Start Canning At Home
Getting started canning seem a bit tricky, but I promise the process gets easier with a little practice. Here are the basic steps that to follow each time you pull out the canner:
- Choose Your Recipe: Pick a trusted, tested recipe. This is really important for food safety. I recommend looking for recipes from sources like the National Center for Home Food Preservation or your local university extension office.
- Gather Equipment: Most beginners only need a few tools: canning jars with new lids and rings, a large pot or a pressure canner, a jar lifter, and a wide mouth funnel. For jams or pickles, a water bath canner is enough. For vegetables and meats, you’ll need a pressure canner.
- Prep Your Ingredients: Wash produce thoroughly. Cut, chop, or peel as needed according to your recipe. Some fruits or vegetables may need blanching (quick boiling followed by an ice bath) to help keep color and texture.
- Fill The Jars: Sterilize jars by boiling them, then pack the food in while everything is hot. Leave the right amount of space, called “headspace,” at the top of the jar so the food can expand as it processes.
- Process the Jars: Place jars in your canner, making sure they’re covered with water if using the water bath method. Follow the timing in the recipe for your type of food and jar size.
- Check The Seal: After processing, allow jars to cool. Press the center of each lid. If it doesn’t flex up and down, you’ve got a good seal. Any jars that haven’t sealed should go straight into the fridge for eating soon.
Safety comes first with canning. Always doublecheck directions, and avoid guessing with recipes. The guidelines were created to prevent things like botulism, a rare but serious illness that happens with improperly canned foods. In the South, many folks swear by handing down notebooks filled with detailed notes on recipes and timings to make sure each batch turns out right.
Supplies Every Beginner Needs for Southern Canning
Stocking up your kitchen doesn’t need to be expensive. I recommend starting out with a few essentials:
- Canning Jars: Regular or wide mouth glass jars, available in pint, quart, or half-pint sizes. They can be reused repeatedly, but always use new lids each time. Buy a dozen at a time, since they stack and store easily.
- Jar Lifter: This is a tool that grabs hot jars so you don’t burn yourself when moving them out of boiling water.
- Funnels and Bubble Remover: A wide mouth funnel keeps your jars clean and helps avoid spills. A plastic spatula or “bubble remover” helps release air bubbles before you seal the jars.
- Water Bath Canner or Pressure Canner: Which type you need depends on what you want to preserve. A water bath canner is cheaper and works for most fruits, jams, and pickles. Pressure canners cost more but are necessary for vegetables, meats, and complex recipes.
The rest of your setup can come from your regular kitchen items. A big stockpot, a ladle, and plenty of clean towels round out the list. Many Southern kitchens even repurpose basic pots and pans until they’re ready to add the next gadget to their canning tools.
Common Mistakes and How to Avoid Them
You will run into a few bumps along the way during your own canning adventure, so here are some of the most frequent mistakes and easy ways to avoid them:
- Not Following Tested Recipes: Using family or internet recipes that aren’t scientifically tested can lead to spoilage. Always lean on recipes from reliable sources.
- Skipping Sterilization: Jars need to be super clean to keep out bacteria. Make it a habit to wash them in hot soapy water and boil them before use.
- Incorrect Headspace: Too much or too little space in the jar can keep jars from sealing properly or cause them to spill during processing. Measurements are given in every recipe and are simple to follow with a ruler.
- Ignoring Altitude Adjustments: Where you live can affect canning times. Consult canning guides to see if you need to add extra minutes for higher elevations.
Learning from each batch gives you more confidence the next time you set up in the kitchen. Over time, you’ll build your own tips and tricks for finding the best produce, timing your canning days, and storing your homemade treasures for maximum freshness.
Advanced Tricks and Preserving Beyond the Jar
Once you’re comfortable with the basics, you can branch out into more creative kinds of preserves. Folks in the South are known for favorites like pear honey, chowchow relish, and green tomato pickles. Trying new flavors or adding spices makes your jelly, jam, or preserved vegetables even more interesting and personal. For instance, adding a dash of cinnamon to apple butter or chili flake to pickles can really turn up the flavor.
- Marmalades and Fruit Butters: Spreadable, packed with flavor, and a fun project for a free afternoon. Making a batch of sweet potato butter or orange marmalade can be a great group activity, too.
- Fermented Pickles and Sauerkraut: These need different techniques and a bit more patience, but the taste is unique and really worth the effort.
Many people also dry, freeze, or ferment foods to stretch the harvest. Dehydrators are great for okra chips or dried apples, while quick freezing works for peas and sweet corn. Combining more than one preservation method keeps meals interesting all year. Experimenting with dried herb mixes, homemade fruit leathers, or even vinegared hot sauces gives you even more ways to show off your bounty.
Real Life Benefits and Family Stories
Through all my years of canning, the best part for me has been seeing the reaction when I share jarred preserves with family and friends. It feels good to use homegrown produce and know where the food comes from. Home canning also helps save money and cut food waste, which is especially helpful with large gardens in the South. It makes celebrations and gatherings feel special when the table is filled with foods you made yourself. Many families keep a tradition of gifting canned treats during holidays, turning your kitchen work into personal gifts with real meaning.
You will remember the first time for life when your own batch of peach preserves turns out perfectly. The color, and the flavor in the middle of January will make you thankful for the time to put a little bit of summer in a jar. Small successes like these encourage you to keep at it, and you’ll find the process rewarding. If you’re looking for more inspiration, the National Center for Home Food Preservation posts excellent step by step guides and updated safety tips. You can also check out local extension service classes or community events in your area to connect with other canners and swap tips and stories.
Frequently Asked Questions About Southern Canning
Question: How do I know which foods need pressure canning?
Answer: Any low acid foods, such as beans, corn, peas, and meats, require pressure canning. High acid foods, like fruits, jams, and pickles, can be processed safely in a water bath canner.
Question: Can I reuse old lids for canning?
Answer: Always use new lids for each canning session. Used lids are less likely to form a reliable seal, which puts your food at risk for spoilage or contamination.
Question: How long do home canned goods last?
Answer: Most home canned foods are best within a year for flavor and safety. Be sure to store them in a cool, dark place, and always check the jar for any signs of spoilage, such as bulging lids or off smells, before eating.
Getting Started with Your First Batch
The tradition of canning in the South remains popular because it works and fits into daily life. Whether you pick berries with your family, grow your own tomatoes, or buy from your local farmers market, home preservation keeps that freshness going all year. So, gather your jars and ingredients, and enjoy the process. Each batch gives you new skills and tastier results down the line. Remember, every good canner started with a first jar, and with each season, you’ll have more stories and homegrown flavors to share with others.